Wednesday, 11 March 2026

Quilted Kindle Sleeves


My sister and I recently purchased the new style Kindles to replace the ones
we had owned for over twelve years.

I wanted to have a go at making quilted sleeves for them, to protect them
when taking them out and about.

I have been following Sam at Curious Handmade on Instagram for a while,
and remembered she had sew along for a quilted book sleeve which I thought I could 
use as a template for the Kindle.

The details can be found HERE on her YouTube channel.


Here is the first one I made for myself, which you can see I made slightly
 too small. I didn't allow enough width on the seam allowance, but I'm pleased to say
it came out ok and is a snug fit for my Kindle!


I used two co-ordinating fabrics from a set of Hobbycraft fat quarters
which have been in my stash a long while.

I then made this one for my sister, taking more care with the measurements
 and this time and it turned out much better and a good fit.


For my sister's cover, I used two co-ordinating fabrics from a fat quarter bundle that
I am sure I bought from Sarah at Flutterby Fabrics during lockdown.
Sarah runs a fabulous online fabric shop on Facebook which you can find HERE

The buttons used were from my stash and the hair bobbles were from Primark.

I really enjoyed making these sleeves, and found them to be nice, easy projects to make,
following Sam's clear and precise instructions.

I definitely recommend giving Sam a follow on both Instagram and YouTube where
you will find lots of inspiration, projects, sewing hints & tips. 

Thank you for visiting my blog today.
Janice x


Friday, 23 January 2026

A Crocheted Blanket/Throw for a Friend


 Today, I am sharing a crocheted blanket that I made at the end of last year
for my friend's husband.


I used the lovely textured Textured Trebles stitch which you can find HERE on
the 'Blossom Crochet' YouTube channel.

Rebekah’s tutorials are really easy to follow and she has lots of different
crochet stitches to share.

I started by deciding how wide I wanted the throw to be and using a
 6mm crochet hook I chained 120 stitches.

I then crocheted the two row repeat pattern until I had used all of the yarn,
which made for a very large blanket this time.


Here are a couple of close up photos of how this stitch looks on bothr sides
of the blanket.


The blanket crocheted up very quickly using this chunky yarn.


I purchased the yarn from Black Sheep Wools when I attended the 
Knit & Stitch Show, Alexandra Palace in October.
Lots of lovely bargain packs to choose from!

I used 12 x 100g balls of Stylecraft Fusion Chunky yarn
in the shade 'Petrol'

Thank you for visiting my blog today.
Janice x


Thursday, 23 October 2025

Sweet Pastel Summer Throw

Today, I am sharing the blanket I recently crocheted
for my friend's 70th birthday.

I made it using the pattern for the Sweet Pastel Summer Throw, designed by
Sue Rawlinson also known as ‘Sweetpea Family’ on Facebook and Instagram 


I purchased Sue's pattern and the yarn pack from Wool Warehouse
which you can find HERE


The pattern uses 9 x 100g balls of Yarnsmiths Create l DK
and I used the following shades:
Denim Blue, Off White, Duck Egg, Vintage Pink, Silver, Light Sage
Linen, Rose Pink, Peachy Pink

Crochet Hooks: 4mm & 5mm


As always, I love the colour combination and the different stitches used in Sue's pattern,
I have a feeling I will be making another sometime in the future.

Thank you for visiting my blog today.
Janice x


Tuesday, 29 July 2025

A Crocheted Blanket/Throw for my Niece

  Today, I am sharing a crocheted blanket that I made earlier this
year for one of my nieces.

I chose the Diamond Weave stitch for this blanket, which I found HERE
as a free pattern on Daisy Farm Crafts blog and I followed the tutorial on
their YouTube channel HERE

I would really recommend you taking a look at both of the above, as there
are lots of tutorials and lovely patterns to follow.

Although the instructions are in US terms, it is easy 
to convert to UK stitches.


I started by chaining 150 stitches using a 6mm crochet hook, I followed the 
four row repeat pattern using each colour way.


I purchased the yarn online from Wool Box
I used Stylecraft Special DK 100g in the following colours:-
2 each of Candyfloss, Cream, Lavender & Turquoise

Thank you for visiting my blog today. 
Janice x


Friday, 20 June 2025

A Crocheted Blanket/Throw for my Great Niece

 Today, I am sharing another crocheted blanket that I made earlier this
year for one of my great nieces.


She’s 5 years old and asked for a pink/mermaid coloured one.
Her Mum sent me a few ideas she’d found online, and this is
what I made. I'm pleased to say that she loved it.


I started by chaining 140 stitches using a 4.5mm crochet hook, and used
the half treble crochet stitch, changing colours every four rows until I 
reached the desired length.


I purchased the yarn online from My Yarnery
I used Stylecraft Special DK 100g in the following colours:-
1 each of Candyfloss, Wisteria, Clematis, Spring Green, Apricot, 
Lemon and Cloud Blue

Thank you for visiting my blog today. 
Janice x


Friday, 31 January 2025

A Crocheted Blanket/Throw for a Friend

  Sharing with you today another crocheted blanket I made before Christmas for
my friend ho I have known since we were 5 years old!


I chose the Crumpled Griddle stitch for this blanket, which I found HERE
on Daisy Farm Crafts blog and I followed the tutorial on their YouTube channel HERE

I would really recommend you taking a look at both of the above, as there
are lots of tutorials and lovely patterns to follow.

Although the instructions are in US terms, it is easy 
to convert to UK stitches.


I started by chaining 160 stitches using a 4.5mm crochet hook.
I crocheted the one row repeat pattern, until I reached the desired length.

For this blanket, I decided not to crochet a border as the 
edges crocheted up nice and straight.


I purchased the yarn online from the Wool Warehouse
using 9 x 100g balls of James C.Brett Stonewash DK
Shade - Violet Mix

Thank you for visiting my blog today. 
Janice x

Wednesday, 23 October 2024

Crocheted Pumpkins and Leaves

Today, I am sharing some crocheted pumpkins and leaves I made recently.
After making this set of pumpkins for a friend, I decided to make myself some
along with the crocheted leaves.


I used these fabulous YouTube tutorials...
Pumpkins - Bella Coco
Pumpkins stalks - Tuula Maaria
Leaves - Blossom Crochet

I really recommend visiting their YouTube channels, as you will find there there
 are lots of tutorials to follow with easy instructions.

For the pumpkins I used Hobbycraft Knitcraft Everyday DK in Orange and Rust
and for the leaves I used scraps of leftover yarn in my stash.


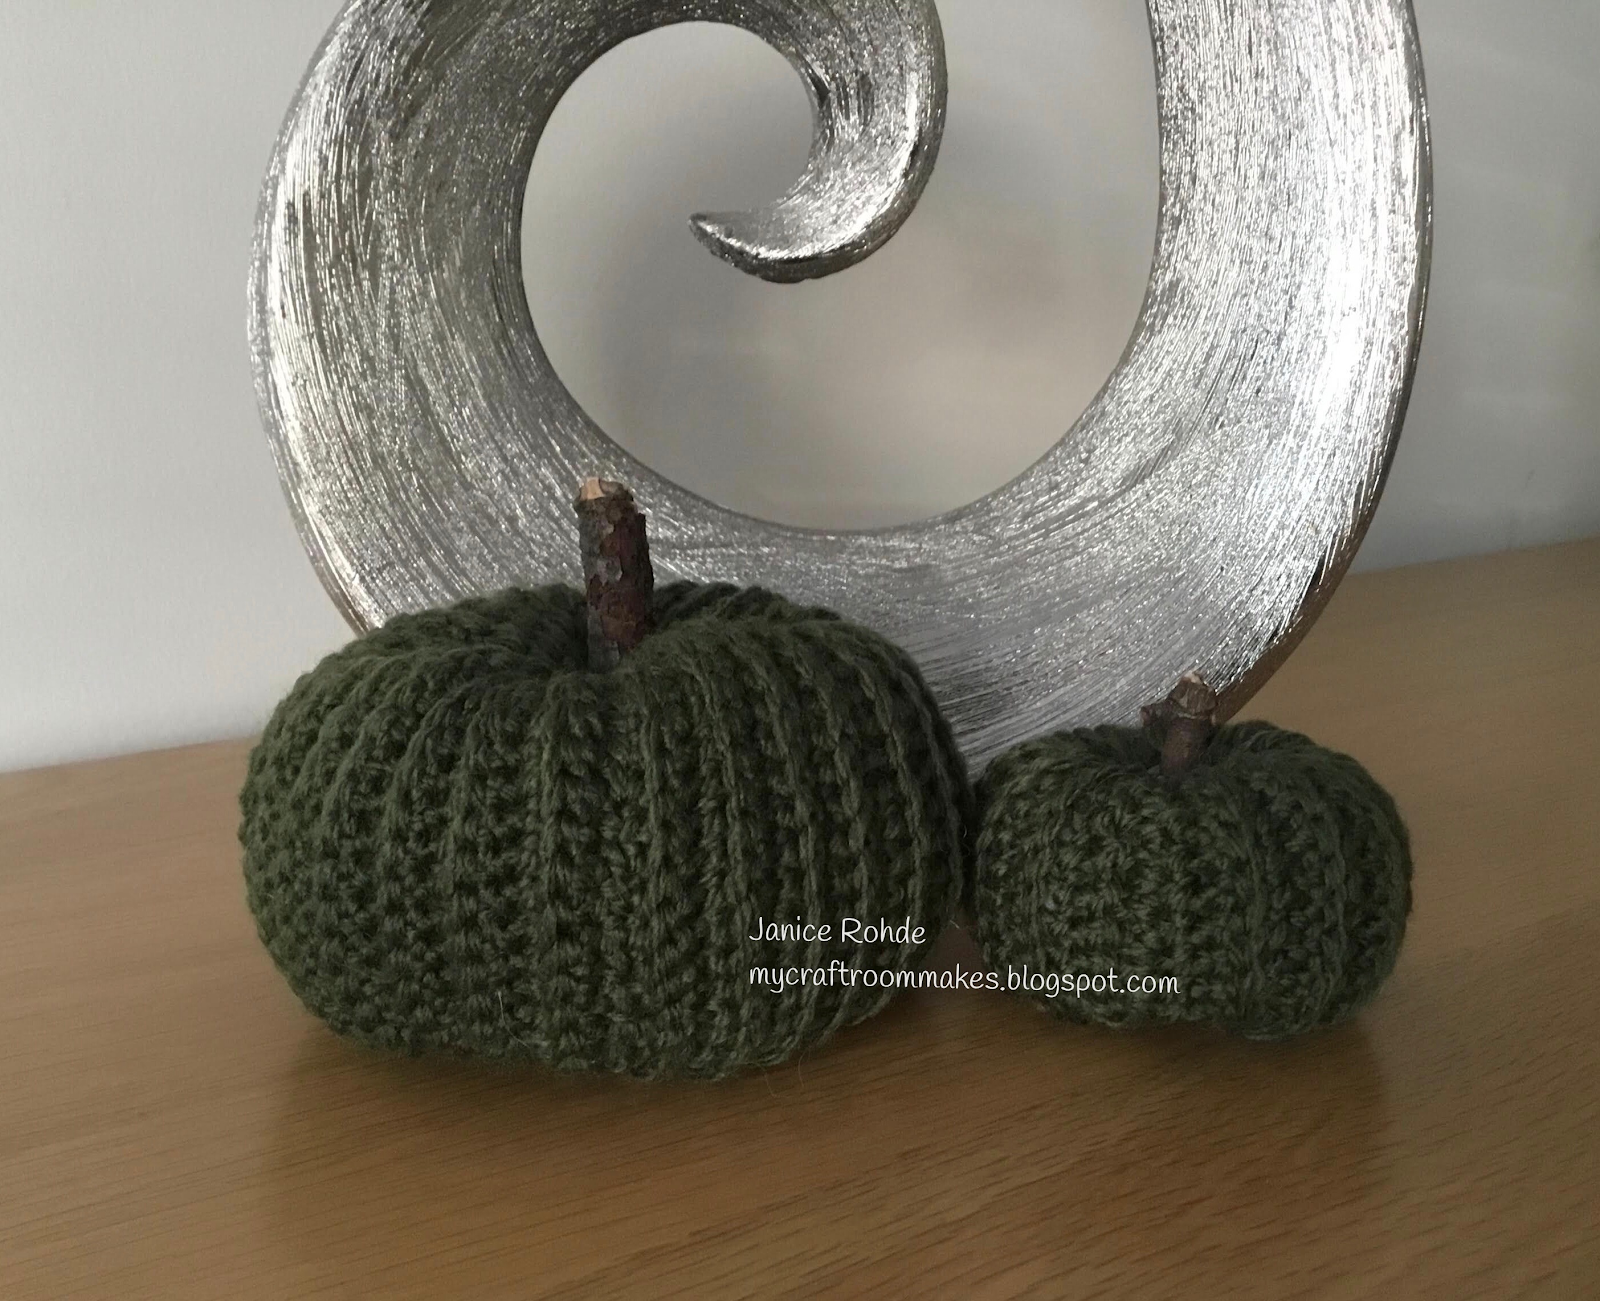
When I taught myself to crochet four years ago, I made a few pumpkins
using some green wool that I had been practicing with.
 I wasn't experienced enough to make the stems, so I used
some twigs instead! They're still securely in place and come out every year,
along with the 'Memory' pumpkins I made with my husband's socks.


Thank you for visiting my blog today.
Janice x

Friday, 4 October 2024

Sweet Winter Blanket crocheted in Navy Blue and Cream


Sharing with you today another crocheted blanket I made
recently for my friend for her birthday.

I made it using the pattern for the Sweet Winter blanket in Navy and Cream.

The pattern was designed by Sue Rawlinson also known
as ‘Sweetpea Family’ on Facebook and Instagram


You can find the original blanket I made HERE, another I made in
neutral colours for my niece HERE and one for my sister HERE


I purchased Sue's pattern from Love Crafts HERE 

I purchased the yarn online from the  Wool Warehouse 
using Yarnsmiths Create DK 6 x Navy and 3 x Cream


I added my own border made up of 1 row DC, 1 row HTR and 3 rows DC.

Thank you for visiting my blog today.
Janice x


Friday, 28 June 2024

A Crocheted Blanket/Throw for my Great Niece

 Sharing with you today another crocheted blanket I recently made
for one of my great nieces.

I chose the Even Moss stitch for this blanket, which I found HERE on Daisy Farm Crafts
blog and followed their tutorial on their YouTube channel HERE

I would certainly recommend taking a look at both of the above, as there are lots of tutorials
and lovely patterns to follow. Although the instructions are in US terms, it is easy 
to convert to UK stitches.


I started by chaining 140 stitches using a 4.5mm crochet hook.
I crocheted the two row repeat pattern, changing the colour every ten rows
until I reached the desired length.

I finished by crocheting a border of one row of double crochet, one row of 
half trebles, one row of double crochet, and one row of 
half trebles.


I purchased the yarn online from Wool Warehouse
using 8 x 100g balls of Yarnsmiths Create DK
 2 in ‘Cream’, 2 in 'Light Pink', 2 in 'Pinkberry' and 2 in 'Purple Orchid'

Thank you for visiting my blog today. 
Janice x

Tuesday, 4 June 2024

Patchwork Baby Keepsake Memory Quilt

 Today, I am sharing a memory blanket made from baby grows.

My friend's daughter asked me if I could make a memory quilt from her
son's baby grows which she had saved.
After researching lots of tutorials on YouTube, I agreed to give it a go,
and this is how I went about the process.

I found using Bonnie's of Happy Space Creates YouTube tutorial really helpful,
as she goes through each step really clearly, which makes it easy to follow.

You can watch her tutorial HERE

I started by putting the baby grows into colour groups, plain and patterns and
any that had a motif or sentiment on the front which I could use.


Once I had decided which ones to use, I cut out a large piece from each one, 
and spent lots of time arranging them into some sort of order!


Next I used a lightweight Vlieseline/Vilene Iron on interfacing on each piece, which
stops the jersey fabric from stretching, and makes it so much easier
to cut into squares.
 
I used a 5.5" x 5.5" square quilting ruler to cut the squares.
I purchased this online from The Quilted Bear
They also have an eBay shop and can be found at the Knit & Stitch shows
held in London.


Next, I rearranged the squares into the final layout...


...and stitched them all together!


 I then placed the stitched squares onto a large piece of polyester wadding
(purchased from John Lewis), and pinned it in place securely using safety pins.

I then sewed along each seam channel using the 'stitch in the ditch' technique
to secure the squares. I used the quilting presser foot for this which came with
my Janome sewing machine.

Lastly, using a large rectangle of grey polycotton fabric, which I cut from a
fitted single bed sheet bought in the Asda sale, I attached it to the quilt front,
and top stitched it all the way round.

This is it when finished .


I really enjoyed making this quilt.
 It's definitely not 100% perfect, but I learnt so much and if I made
another, I know where I would make some changes.

I  think it's a great way of keeping special memories of your children
from when they were babies, and I'm pleased to say that my friend's daughter
was very pleased with it.

Thank you for visiting my blog today.
Janice x


Thursday, 23 May 2024

Birthday Card for my Great Nephew


Today, I am sharing the birthday card I made in March for one 
of my great nephews.


I used the Crafter’s Companion football embossing folder to partially
emboss the card base. I then embossed two narrow lines to edge
the embossing using my Scor-Buddy.

Lastly, I used 3D foam pads to attach the die-cut circles to the card.
I finished by adding the number, his name and the tiny circles.

The products I have used:
Crafter’s Companion embossing folder - Football Crazy
Spellbinders Nestabilities - Circle and Scalloped Circle
Number and alphabet dies - Brand unknown
EK Success punch - Three tiny circles
Scor-Buddy

Thank you for visiting my blog today.
Janice x

Friday, 3 May 2024

A Crocheted Throw/Blanket for my Great Nephew

 Today I am sharing a crocheted throw I recently made for my 5 year old
great nephew.


I used the lovely textured Textured Trebles stitch which I found HERE on
the 'Blossom Crochet' YouTube channel.

Rebekah’s tutorials are really easy to follow and she has lots of different
crochet stitches to share.


I started by chaining 140 stitches using a 6mm crochet hook.

I then crocheted the two row repeat pattern until I reached the desired length.

I finished by crocheting a border of one row of double crochet, two rows of 
half trebles, and one row of double crochet.


I purchased the yarn from Fabric Giant
using 7 x 100g balls of Woolcraft New Fashion DK
 3 in ‘Navy’, 2 in 'White' and 2 in 'Multi Blue'

Thank you for visiting my blog today. Next time I'll be showing you
the one I have made for his sister!
Janice x


Thursday, 2 May 2024

Mother’s Day cards

Sharing two Mother’s Day cards today, which I made in March, for my 
friends to give to their Mums.


The products I have used are:
Couture Creations A4 Embossing folder - Swiss Dots
Hunkydory - The Second Little Book of Decoupage
Alphabet die - Unbranded


The products I have use are:
Spellbinders Labels Ten
Couture Creations A4 Embossing folder - Tied Together
Hydrangea stamp - Unbranded
Promarkers
Stitched pennant die - Unbranded
Sentiment - PC generated


Thank you for visiting my blog today.
Janice x


Friday, 22 March 2024

A Crocheted Throw/Blanket for my Niece

Today I am sharing a crocheted throw I have made for one of my nieces.


She found this design of a knitted blanket on the Dunelm website, and asked  
if I could crochet something similar.

I used the lovely textured Cluster stitch which you can find HERE on
the 'Blossom Crochet' YouTube channel.

Rebekah’s tutorials are very easy to follow. She has lots of different
crochet stitches, tips and techniques to share on her YouTube channel
and her Instagram account found HERE


I started by deciding how wide I wanted the throw to be and using a
4mm crochet hook I chained 146 stitches.

I then crocheted the two row repeat pattern until I reached the desired
length, (larger than my usual blankets) and I didn't add a border.


I purchased the yarn from Hobbycraft
using 11 x 100g balls of Women's Institute Premium Acrylic
in the colours Bright Lilac, Light Pink, Cream, Mustard, Honey, Soft Blue,
Denim, Vanilla, Aqua, Hot Pink and Magenta.

Thank you for visiting my blog today.
Janice x